Hi there, this is Marco, Art Director from Space Lizard studio!
Today I wish to share with you my personal opinion on pixel art creation process for video-games. This is the method I use in order to quickly visualize concept art and produce assets.
Due to the short development time we have chosen for Dragon Bros, I need to skip the hand drawing concept process. Instead, I use a more direct approach that gives me more time to refine and polish the final assets used later in game.
Everything starts with a canvas
Because I want to know immediately if something will look good in game, I usually create a canvas that has the same pixels size as the game resolution.

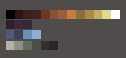
Chose a colour palette
Usually, it is a good idea to gather inspiration from other products: pictures, movies, other video games and so on. Or, if you feel confident, you could use some online tool that will make your life much easier.
For instance, Adobe offers a free service that helps you to browse colors and create your own palette:
The Adobe color-wheel.
Paint on a color
The background should be filled with a color before starting painting the assets. There’s a good reason for it: the background color will strongly modify the perception you have of the colors on top of it.
Try to paint the same red on a white canvas and on a mid grey canvas. Put them next to each other. It will drastically change your perception of the luminosity and general tone of the color.
Since we do not want any surprise when the asset are placed in the game, it’s best to use a unique background color: the one you will use in game (sky, etc).
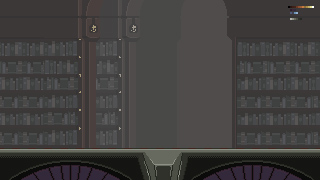
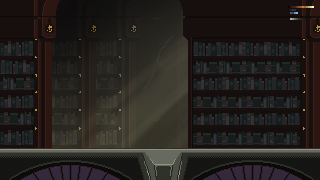
Start from the bottom.
It is tempting to start painting the elements and decorations we imagine first in the scene. But to achieve a coherent look among our assets, it’s always better to start painting the biggest portion of the screen space.
In Dragon Bros we decided to use one to four parallax layers. Because of that I usually start with the background layer which is nearest to the camera and will give the direct contrast to the items in the Character layer.
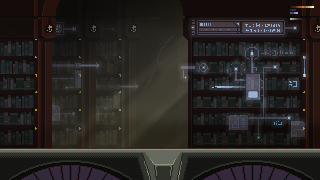
Always use and organize your layers
When painting assets and backgrounds, keep in mind that what you are painting will be the actual asset exported to the game. You will need to export them individually, so don’t paint everything on the same layer!
Keep your layers organized and clean, invest time to keep your scene clean and it will repay later, during the exporting process. Like a lot.
Also, use groups as much as possible. They are very useful to keep the animation’s frames organized and different objects drawn on multiple layers.
Keep it simple
Part of the beauty of the pixel art is that it is based on the overview: simple details that build a very complex scene.
You shall reflect this idea in the way you think your assets. Don’t over-complicate small details. Make simple things that are themselves little simple details for the biggest context.
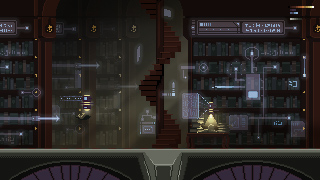
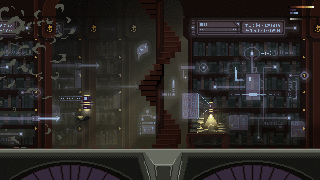
Animations
Animated scenes reflect best what the game will look like eventually. So animate it!
Then move your assets around and always focus on the context. Does it still feel good?
When building your level in your game engine, chances are that objects will be moved around – again!- for gameplay or esthetic reasons. So you need to double check this and build a few different combinations.
Animating is long, but here’s the good news: you don’t need long animations to make it look good. Four to eight frames are usually enough to give a nice feeling. Of course, it is totally fine to do more if an object requires it!
Polishing and Exporting
I find this part to be the most time consuming: you need to isolate the frames and assets in their dedicated textures in order to export them to your game engine. Of course, this process will take advantage of a good layer organization during the painting process (see previous part!)
This step will reveal all the defects that were hidden by the overlapping layers, so take your time and polish all the imperfections you may spot.
Export your textures and you are ready to create your in-game assets in Unity!