Using singletons in Unity

Hi everyone! I hope you are ready to get some great Easter holiday time? Or maybe advance your Unity projects? If so, this may interest you!

I am Guilhem, the main programmer at Space Lizard Studio and I will discuss the use of singletons in unity, how to mix them with monobehaviors and get a clean implementation of those.

This course is for beginner or intermediate programmers, or advanced programmers starting to use Unity.

What is a Singleton?

A singleton is a design pattern for objects that are not supposed to be created more than once. A music manager for instance: you probably don’t want more than one music manager in your game at any given time. The Singleton helps you to enforce this rule, and gives you a shortcut to access this music manager.

A very simple singleton implementation could be:

public class Singleton <T> where T: Singleton<T>, new()
{
    protected Singleton() { }
    public static T Instance 
    { 
        get 
        {
            if (instance == null)
                instance = new T();
            return instance; 
        } 
    }

    protected static T instance = null;

}

[...]

public class MusicManager: Singleton<MusicManager>
{}

Let’s start with the first line: “protected Singleton () {}”. Here we say “hey that constructor is off limit, you can’t create a singleton by using new Singleton<T>() or new MusicManager()”. Instead, we want people to use the property “Instance”. So to access the music manager, you would do MusicManager.Instance(). If it is the first time someone call the music manager, then it will create a music manager. It will save it in a static variable called instance (with a small ‘i’). The second time someone calls the music manager, it will find this already created instance and return it. No one can create it twice anymore!

Why should I use it?

Because it’s crazy convenient. First, you don’t need to check if a music manager already exists, or not, or how to handle two music managers, etc. But the second and most important reason, is that now you can call MusicManager.Instance from anywhere in your code. Let’s say you have a MusicChangerEvent for instance, you can easily do something like that:

MusicManager.Instance.SetMood(MusicMood.Mysterious);

What if I want a MonoBehavior singleton?

As you get used to those convenient Singleton, you may wonder how to make them monobehaviors AND singletons? Well it’s a bit different, but not necessary more complex:

public class MonoSingleton<T> : MonoBehaviour where T : MonoSingleton<T>
{
    public static T Instance { get { return instance; } }
    protected static T instance = null;

    protected virtual void Awake()
    {
        if (instance != null)
        {
            Debug.Log("You have two instances of " + gameObject +" mono singleton!");
            gameObject.SetActive(false);
            Destroy(gameObject);
        }
        else
            instance = (T)this;
    }
}

public class BulletsManager: MonoSingleton<BulletsManager>
{}

Here we can’t make the constructor private or protected – this is a monobehavior. So instead you may want to destroy any additional monobehavior that gets created, and warn the user about this.

The awake function is marked as virtual. If you haven’t encountered this word before, it means that this function can be overridden by any class inheriting MonoSingleton (its “children”) if they want to. So virtual is a bit like “check if my children have changed the behavior of this function”. The children will simply have to declare the function again and replace “virtual” by “override”.

You will note that this is a bit different from the precedent case: what if you haven’t added this mono singleton to the scene? Well, it will crash. Not cool eh? So we need to do two things:

  • add an error message before it crashes in the Instance.get. This will be useful for simple MonoSingletons that are mandatory in the scene. Make the message meaningful, because your designers will be the ones reading it. Something like: “Hey Mike, you forgot to add a Bullet Manager to the scene”.
  • create a special mono singleton that can instantiate itself if it is not in the scene. This will be useful for objects that you may want to have sometime in your scene, but not always. They need to be OK to load from disk and create a small stutter. A special UI error message would fit for instance: as the player unplugs the game pad, you want to display your UI error message. This is unlikely to happen every time, so it is the perfect case. As you will pause the game as soon as the player unplugs the cable, it is OK to have a 1s stutter while the MonoSingleton is loaded and instantiated.

This second MonoSingleton will be a bit different:

public abstract class  MonoRobustSingleton<T> : MonoBehaviour where T : UiSingleton<T>
{
    public static T Instance
    {
        get
        {
            if (instance == null)
            {
                string fileName = "Prefab/MonoSingletonPrefabs/" + typeof(T).Name;
                GameObject newSingleton = (GameObject)GameObject.Instantiate(Resources.Load(fileName));
                return newSingleton.GetComponent<T>();
            }
            return instance;
        }
    }

    protected static T instance;

    protected virtual void Awake()
    {
        if (instance != null)
        {
            Debug.LogError("MonoRobustSingleton " + gameObject + " is instanciated twice.");
            Destroy(this);
            return;
        }

        instance = (T)this;
    }
}

public class PadDisconnectedErrorMessage: MonoRobustSingleton<PadDisconnectedErrorMessage>
{}

We still have the static instance, and the error messages in the Awake function to handle unexpected scenarios. But the instance creation is different: we load a prefab from the resources folder. We could go the easy way and create a GameObject and add a component T to it. The issue though is that your MonoRobustSingleton will often need other components and some children to work. So we force the user to create a prefab, name it PadDisconnectedErrorMessage and store it in the Resources folder. This folder is a bit magic: whatever file is placed inside it will be taken by Unity upon building your game. It will be accessible later for hot loading, even if no one references it explicitly. The files in the other folders will only be included in the built if they are referenced somehow by an object in your scene. So our MonoRobustBehavior prefabs are safe in this resource folder! They will be lazy-loaded whenever needed (lazy in the sense “only done if required, not loaded by default).

Conclusion

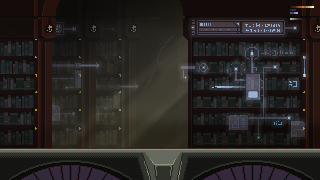
The mono behavior singletons are not as safe as the classical singleton, nor as easy to use, but they remain a very powerful system. For our game, we based our UI system on MonoRobustBehavior: we wanted to load the bare minimum UI with the scene, to speed up loading times and allow higher modularity (ie: call any UI screen when you need it, no matter the context or the scene setup). So when you press “pause” or go through the menus, we hot load the UI as required. Although the framerate does go down whenever a new page is drawn, it is impossible to tell the difference. It would be visible though if we used it to load enemies for instance, as a small lag is much more noticeable when you move a character in real time than when you press a button to go from a menu page to another. But it saved us a few seconds of loading screen on our game! (we have simple scenes but heavy UI).

Anyway, I hope this post will help you with singletons! I know some people find them overused, but for simple projects I find them perfect and easy to understand. If you have any comment, disagree or even think I am Hitler reincarnated, leave a comment!

Social media frenzy

Game Music: Recording and Mixing the Soundtrack of your Game

Deciding what kind of music you want for your game is tough and sometimes you end up with some kind of soundtrack that doesn’t add any value to your gameplay.

I guess it all depends on personal taste, however it’s always important to understand the type of feeling you want to convey to the players out there. People are eager to have a new experience with every new game they buy in this time and age, especially among the Indie environment where Audio is as important as Arts and creativity and originality is truly rewarded. I like to call it the Renaissance of Computer Arts :D.

My name is Gabriele and I am the Composer and Audio Director at Space Lizard Studio Ltd. I was influenced by video game music since I was a kid and had my Commodore 64 up and running. I’ve always tried to adapt the music I’ve composed to the mood of the games we were developing, as I wanted to put myself in the user’s shoes and get the best experience out of it.

The current project we are working on is a Run & Gun game called Dragon Bros featuring 4 teenage dragons with guns, that’s right dragons and guns, explosions, fun, chaos. I want fun in my soundtrack, I want chaos, I want a fast paced burst of adrenaline. Hey! It’s a retro-Pixel art game…I want chiptunes and rumbling guitars! Something like this:

IntroFrame 01

This track is still work in progress and not equalized yet. So let’s talk about equalization!

You have two challenges here: Distorted guitars and high pitch chiptunes. Equalizing those to optimal settings is a pain so here’s some useful tips that may help you out in future if you ever decide to crazy mix these two things together.

Guitars

First, get the sound you like for distorted guitar by tweaking your effects, plugin or pre-amp. After, and only after, start thinking about EQ (equalization).

If you want punch and impact you may want to boost 70-90 Hz frequencies and set highpass to 50 Hz.

Spend a lot of time in tweaking anything between 150 and 700 Hz as this will define what’s the “glue” of your instrument. If you use multiple guitars and want to make some of them more clear, then play around the 2 kHz area as you like.

If guitars get way too bright, try to cut a bit the 8-10 kHz so it doesn’t clash with your high pitch chiptune effects. It is very important to remove the hissing sounds as much as you can, so you may want to cut a bit the 3-4 kHz category too.

I find it useful to record at least 4 tracks of the same guitar at once if you want that wall of background heaviness in your chorus. I use these Pan settings for my multi track guitars:

1- 90% Left mid-low frequencies.

2- 90% Right mid-low frequencies.

3- 60% Left mid-high frequencies.

4- 60% Right mid-high frequencies.

Polish everything with a last touch of compression to get rid of hissing noise and dodgy frequencies, not too much though.

CHIPTUNES

These SFX (sound effects) may be highly annoying overtime. Trust me, you don’t want them to drill your brain constantly for several minutes.

Best way to make them less annoying is to make the higher harmonics less intense, as they are super bright. 10 kHz – 14 kHz – 20 kHz, put them way below 0dB, and raise 55 to 800 Hz keeping whatever is between 1.2 kHz and 5 kHz at mid level.

This will kill that harsh effect in some parts making them sound better in the mix with guitars.

My last work for a level – meant to be inside of a Crystal Cave – features a lot of different chiptunes mixed with guitars and breakdowns and a bit of darker moments and echos. I am still not entirely satisfied in regards to the percussion yet, but this sample can give you an overview of the EQ I am trying to harmonize in the Mix.

Caveconcept02

I hope you found this post useful and if you have any thoughts or suggestions to share, feel free to comment down below or reach us on Facebook!

Wishing you the best,

Gabriele Caruso

Social media frenzy

2D game graphical assets workflow: how to be efficient

Hi there, this is Marco, Art Director from Space Lizard studio!

Today I wish to share with you my personal opinion on pixel art creation process for video-games. This is the method I use in order to quickly visualize concept art and produce assets.

Due to the short development time we have chosen for Dragon Bros, I need to skip the hand drawing concept process. Instead, I use a more direct approach that gives me more time to refine and polish the final assets used later in game.

Everything starts with a canvas

Because I want to know immediately if something will look good in game, I usually create a canvas that has the same pixels size as the game resolution.

01

Chose a colour palette

Usually, it is a good idea to gather inspiration from other products: pictures, movies, other video games and so on. Or, if you feel confident, you could use some online tool that will make your life much easier.

For instance, Adobe offers a free service that helps you to browse colors and create your own palette:

The Adobe color-wheel.

Palette

Paint on a color

The background should be filled with a color before starting painting the assets. There’s a good reason for it: the background color will strongly modify the perception you have of the colors on top of it.

Try to paint the same red on a white canvas and on a mid grey canvas. Put them next to each other. It will drastically change your perception of the luminosity and general tone of the color.

Since we do not want any surprise when the asset are placed in the game, it’s best to use a unique background color: the one you will use in game (sky, etc).

Start from the bottom.

It is tempting to start painting the elements and decorations we imagine first in the scene. But to achieve a coherent look among our assets, it’s always better to start painting the biggest portion of the screen space.

In Dragon Bros we decided to use one to four parallax layers. Because of that I usually start with the background layer which is nearest to the camera and will give the direct contrast to the items in the Character layer.

02 03 04 05

Always use and organize your layers

When painting assets and backgrounds, keep in mind that what you are painting will be the actual asset exported to the game. You will need to export them individually, so don’t paint everything on the same layer!

Keep your layers organized and clean, invest time to keep your scene clean and it will repay later, during the exporting process. Like a lot.

Also, use groups as much as possible. They are very useful to keep the animation’s frames organized and different objects drawn on multiple layers.

Keep it simple

Part of the beauty of the pixel art is that it is based on the overview: simple details that build a very complex scene.

You shall reflect this idea in the way you think your assets. Don’t over-complicate small details. Make simple things that are themselves little simple details for the biggest context.

Animations

Animated scenes reflect best what the game will look like eventually. So animate it!

Then move your assets around and always focus on the context. Does it still feel good?

When building your level in your game engine, chances are that objects will be moved around – again!- for gameplay or esthetic reasons. So you need to double check this and build a few different combinations.

Animating is long, but here’s the good news: you don’t need long animations to make it look good. Four to eight frames are usually enough to give a nice feeling. Of course, it is totally fine to do more if an object requires it!

output_fndt2Y

Polishing and Exporting

I find this part to be the most time consuming: you need to isolate the frames and assets in their dedicated textures in order to export them to your game engine. Of course, this process will take advantage of a good layer organization during the painting process (see previous part!)

This step will reveal all the defects that were hidden by the overlapping layers, so take your time and polish all the imperfections you may spot.

Export your textures and you are ready to create your in-game assets in Unity!

Social media frenzy

Unity: a guide to moving platforms in 2D

Hi everyone! Today we would like to share with you our experience with moving platforms and physic based character controller in Unity.

This is an basic / intermediate tutorial. We will assume you know a bit of C#.

The problem

I will take as an example the elevator that our team has designed to allow our Dragon Bros to reach the lower levels of the mining facility.

The first approach was to create a Gameobject with a BoxCollider2D, a Rigidbody2D and an animator. We also added a custom script to it, to keep track of the elevator status: waiting or moving.

The lift starts moving when one of the character triggers a designated collider (typically when entering the elevator’s cage).

Finally, an animation controls the movement of the lift, by simply changing the position of the elevator.

First problem

The elevator’s movement is shaky. It doesn’t matter if the character is on it or not.

First solution

Do NOT animate a rigidbody position. It is best to use RigidBody.MoveTo, so the rigidbody can compute the exact force needed to move to a position in one frame, by countering gravity, friction and inertia.

Once this is fixed, we encountered…

…A second problem

The resulting lift correctly moves, but the character is falling for a couple of frames, reaches the platform, collides with it, and then again fall again in an endless loop. It looks terrible and flickers.

ElevatorIssue

And a second solution!

To solve this issue we decided to implement a SliderJoint2D to constrain the position of character on the y axis(vertical one).

void ConnectTo(Rigidbody2D character)
{  
  SliderJoint2D joint = GetComponent<SliderJoint2D>();
  joint.connectedBody = character;
}

void OnCollisionEnter2D(Collision collision)
{
    if (collision.collider.gameObject.layer == LayerMask.NameToLayer("Character")
    {
        ConnectTo(collision.collider.GetComponent<RigidBody2D>());
    }
}

The slider is connected to the character RigidBody2D as soon as the character collide with the elevator. Now the character is not falling / flickering anymore, but the character has lost the capabilities to jump!

The solution to this is to create an event to be invoked when the player press the jump button. When the event is called, we release the slider. We will reconnect it when the character lands again on the platform.

void Connect(RigidBody2D  character)
{
    ...

    // listen to the character jump event
    character.GetComponent<CharacterController>().onJump += OnCharacterJump;
}

void OnCharacterJump(CharacterController character)
{
    Disconnect(CharacterController character);
}

void Disconnect(CharacterController character)
    // do not listen to this anymore
    character.onJump -= OnCharacterJump;

    // disable the joint by unplugging the character
    joint.connectedBody = null;
}

Similarly the slider is removed when the player walks away from the platform.

void FixedUpdate()
{
    if(joint.connectedBody != null
    &&  Mathf.Abs(transform.position.x - joint.connectedBody.transform.position.x) 
        >= kBreakingDistance)
    {
        Disconnect(joint.connectedBody.GetComponent<CharacterController>());
    }
}

Now the character is constrained on top of the elevator. But it also is when colliding with its bottom or side! To solve this issue we will add a check on the direction of the collision.

void OnCollisionEnter2D(Collision collision)
{
    if (collision.collider.gameObject.layer == LayerMask.NameToLayer("Character"))
    {
        Vector2 direction = collision.contacts[0].normal;
        if (Mathf.Approximately(direction.y, -1f))
        {
            ...

And now the position of the character can be adjusted by properly setting the anchor point of the slider before connecting the two RigidBody2D.

// upon collision, record our distance and use it as an offset.
joint.anchor = new Vector2(0f, Mathf.Abs(transform.position.y - character.transform.position.y));

It looks better, but we still face a subtle flickering in the character and the platform.

We tried to decrease the Physic TimeStep to 0.01f instead of 0.02f and it actually made this issue less noticeable, but still visible and also lowering the overall performance. It was not a real solution, just hiding the problem!

We also tried to the change the physic material to increase the friction and zeroed the bounciness, made sure to move the lift RigidBody2D with the method RigidBody.Moveposition() and also increased its mass but the flickering remained.

A bit desperate, we tried parenting the character to the elevator, which kind of worked but raised other issues. Disabling the collision between the elevator and the character kind of worked as well, but proved unnecessary later.

Final solution to the flickering

The flickering is due to the opposite forces being applied by the slider and the collider of the platform counterbalancing the weight of the character, plus the approximation made by the physic engine.

To solve the problem, we nullified the gravity scale on the character as soon as it collides with the elevator and store it. When it disconnect, its gravity scale is set back to its stored original value.

And there you go…. we now have the perfect elevator!

THE FUTURE

Local multiplayer

If you have two players or more sharing the elevator, you will probably encounter problems with the previous code!

The solution is pretty simple: have one slider joints per player. Store them in a table and store the players in another table. Surround the code with a few loops, you’re done!

Complex cart movement

Maybe you want your cart to stop midway, as if temporary out of order? Or you want it to go very fast suddenly, as if the brakes are giving up? There are many ways to do this. The one we chose was to have a list of waypoints, each assigned with a speed and an optional wait. We created dummy game objects in our scene, named “Elevator Waypoint 1”, etc, and assigned them to the elevator’s list of waypoints.

Super mining cart

This lift is the first step towards… a mining cart of course! Now that you have locked the vertical movement, you will simply need to lock the horizontal one as well, with a slider joint at 90 degrees. This system combined with the cart movement will allow you to easily create crazy mines levels!

Social media frenzy