Hi everyone, today we would like to share our experience about Checkpoints in Unity. As we are developing a 2D platform game, it soon came to us that using checkpoints was mandatory.
Note: This is a beginner guide, if you are an intermediate or advanced Unity user, this will probably be a bit too detailed for you.
The basics: creating a checkpoint
It’s super simple: create a game object. Place it where your checkpoint should be. You probably want to make it visible somehow (flag, life stone, etc) : add a sprite renderer or a mesh renderer.
Then you want to add a collider to it. It is tempting to make it match its graphic renderer. Do not: what if a player jumps above it? Or ducks underneath it? Unless it is part of your gameplay, make sure to make it so large that it can’t be avoided as the player progresses through the level.
The collider needs to be set to trigger of course, so your player can pass through it.
You may want to play an animation when the player goes through it : the flag goes up, the life stone shines, etc. As usual, add your animation controller and your three animations (non-activated, activating, activated for instance).
You will also need to create a custom script and attach it to your new game object. It will probably look like that:
using UnityEngine;
using System.Collections;

public class CheckPoint : MonoBehaviour
{
    // have we been triggered?
    bool triggered;

    void Awake()
    {
        triggered = false;
    }

    // called whenever another collider enters our zone (if layers match)
    void OnTriggerEnter2D(Collider2D collider)
    {
        // check we haven't been triggered yet!
        if ( ! triggered)
        {
            // check we actually collided with
            // a character. It would be best to
            // setup your layers so this check is
            // not required, by creating a layer
            // "Checkpoint" that will only collide
            // with characters.
            if (collider.gameObject.layer
                == LayerMask.NameToLayer("Character"))
            {
                Trigger();
            }
        }
    }

    void Trigger()
    {
        // Tell the animation controller about our
        // recent triggering
        GetComponent<Animator>().SetTrigger("Triggered");

        triggered = true;
    }
}
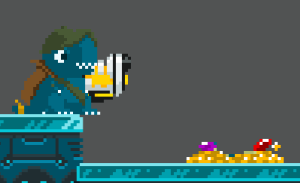
Non triggered:
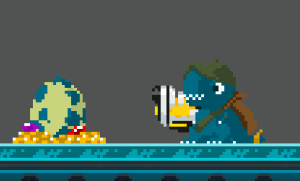
Triggered:
Phase 2: Detect character’s death
We will assume you have a “Death” function in your character controller. We want to be warned of the character’ death. An easy way to do this is by using an event. It is much cleaner than polling, which could be summed up to “Every frame, check if character is dead”. So create an event “OnDeath” in your character controller:
public delegate void MyDelegate();
public event MyDelegate onDeath;
And call it upon death:
void Death()
{
    onDeath.Invoke();
}
Now in we will modify the Checkpoint’s Trigger function to subscribe to this:
void Trigger(Collider2D collider)
{
    CharacterController character = collider.GetComponent<CharacterController>();
    character.onDeath += OnCharacterDeath;
    ...
}

void OnCharacterDeath()
{

}
That’s it! OnCharacterDeath will be called whenever the Death() function is called.
Phase 3: pass the death information
Now we need to notify your enemies, bonus crates and such that they should reset to their initial state. Create a new script called RespawnController. We will attach this script to every object requiring respawn notification.
using UnityEngine;
using System.Collections;

public class RespawnController : MonoBehaviour
{
    public CheckPoint respawningCheckPoint = null;

    public delegate void MyDelegate();
    public event MyDelegate onRespawn;

    Vector2 initialPosition;

    void Awake()
    {
        initialPosition = transform.position;
        respawningCheckPoint.onRespawn += OnRespawn;
    }

    public void OnRespawn()
    {
        transform.position = initialPosition;
        onRespawn();
    }
}
This script will position the objects back to their initial position. Every component of your enemy should also subscribe to the RespawnController.onRespawn event to deal with their internal resetting needs: your enemies should get their hit points back, your puzzles should reset, etc.
This means that your enemies and crates shouldn’t destroy themselves upon death, but rather go dormant (using gameObject.SetActive(false) for instance) so they can be respawned easily.
You will need to assign manually every enemy’s checkpoint in Unity. I strongly recommend adding a check in your RespawnController’s awake function:
if (checkpoint == null)
{
   Debug.LogWarning("You forgot to assign a checkpoint to enemy " + gameObject.ToString());
}
This will help you find the few enemies you may have forgotten to attach to a checkpoint.
Multiple checkpoints
Now you will want more than one checkpoints of course! And only the current checkpoints’s enemies should be reset! So we need a way to know which checkpoint has been activated last.
So let’s create a checkpoint manager! Create a new GameObject “CheckpointManager” and make sure your checkpoints are its children.
Create a CheckpointManager.cs script and attach it to your newly created checkpoint manager object:
public class CheckPointManager : MonoBehaviour
{
    public List<CheckPoint> CheckPoints { get { return checkPoints; } }
    public CheckPoint CurCheckPoint { get { return checkPoints ? checkPoints[curIndex] : null;}}
    public static CheckPointManager Instance {get{return instance;}}

    List<CheckPoint> checkPoints = new List<CheckPoint>();
    int curIndex = 0;
    static CheckPointManager instance = null;

    protected override void Awake()
    {
        instance = this;

        // find all my check points children
        for(int i = 0; i < transform.childCount; ++i)
        {
            CheckPoint checkpoint = transform.GetChild(i).GetComponent<CheckPoint>();
            checkpoint.onTrigger += OnCheckPointTriggered;
            checkPoints.Add(checkpoint);

        }
    }

    public void OnCheckPointTriggered(CheckPoint newCheckPoint)
    {
        curIndex = checkPoints.IndexOf(newCheckPoint);
    }
}
Now in the Checkpoint’s OnCharacterDeath function, you can decide whether or not you should reset your list of enemies:
void OnCharacterDeath()
{
    if (CheckPointManager.Instance.CurCheckPoint == this)
    {
        onRespawn.Invoke();
    }
}
Tadaa! You do not need to worry about your whole level resetting upon death, only you latest part will.
Note: you may be like “WTF is this static Instance mumbo jumbo doing here”. Bear with us, next week we will tell you more about the mighty power of the Singleton!
Some random diagram
Here is a short diagram of what we just wrote:
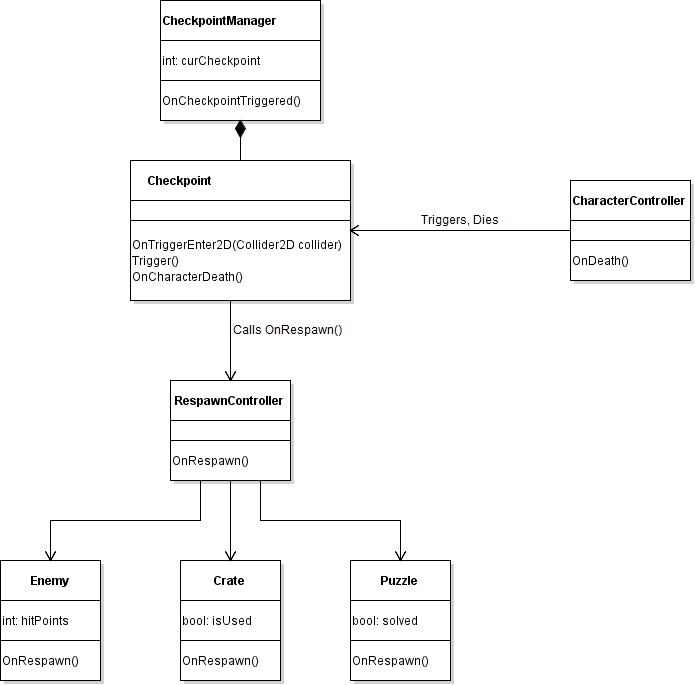
The CheckpointManager holds the checkpoints list. The CharacterController notifies the Checkpoint. In turn, it notifies the enemies, crates and puzzles.
And much more…
Now you have a basic checkpoint system. But I am sure you will want to have extra stuff added! This will probably depend on your game design, but you will easily implements those:
- Checkpoints can be triggered more than once, so the character can navigate backward.
- Optimize the number of active enemies on screen by having them to be SetActive(false) until their checkpoint is activated. This can save a lot of CPU!
- Deactivate enemies that belong to older checkpoints, still optimization.
- Optimize your level restart: no need to reload the whole scene if your checkpoint system is robust!
- handle local multiplayer checkpoints.
- Add a debug menu to teleport to another part of the level. This will greatly help you test your game! But make sure to surround the code with
#if DEBUG

// debug code

#endif
so you do not publish those debug tools!
- use those checkpoints as a save point, so the level can be played from there again next time the game starts.
- …
Have fun! And please leave a comment here if you have a question, found an error or even totally disagree with us 😉